How to Sew a DIY Letter Banner
A fun, simple, yet meaningful sewing project that comes together in just a few minutes! Make a DIY letter banner for your mantle, make name signs for kids rooms, or any other creative project you can think of!

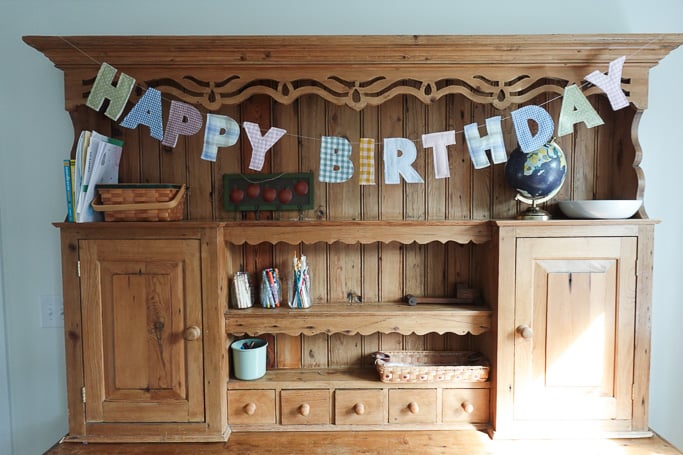
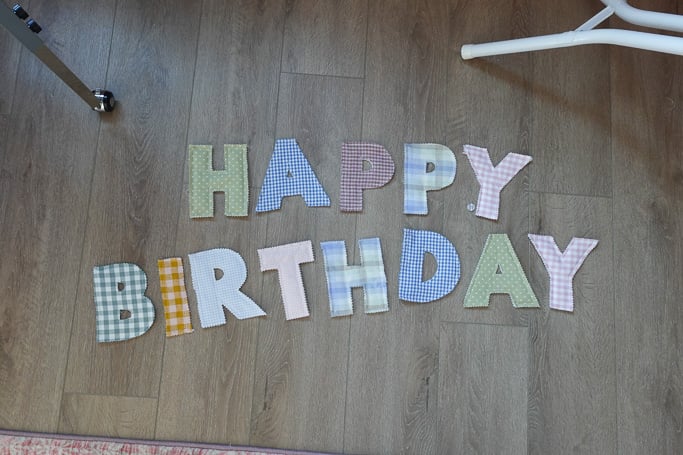
If you love sewing projects that feel meaningful and help clear out your scrap bin, this DIY letter banner is for you. This fabric letter banner can be made with fabric scraps, a layer of batting, and is designed to hang on your mantle year after year to celebrate everyone in your family.
Not only is this DIY letter banner charming and customizable, it’s also the perfect way to use up leftover fabric pieces that are too special to throw away. Let’s walk through the process step by step.
Why You’ll Love This DIY Letter Banner
- Uses fabric scraps you already have
- Soft, quilted look thanks to batting
- Reusable for every birthday (no disposable decor!)
- Easy to personalize with colors, themes, or names
- Makes a meaningful family tradition
If you’re sentimental about fabric leftovers (old dresses, baby blankets, seasonal prints), this project is especially fun.
Supplies for DIY Letter Banner
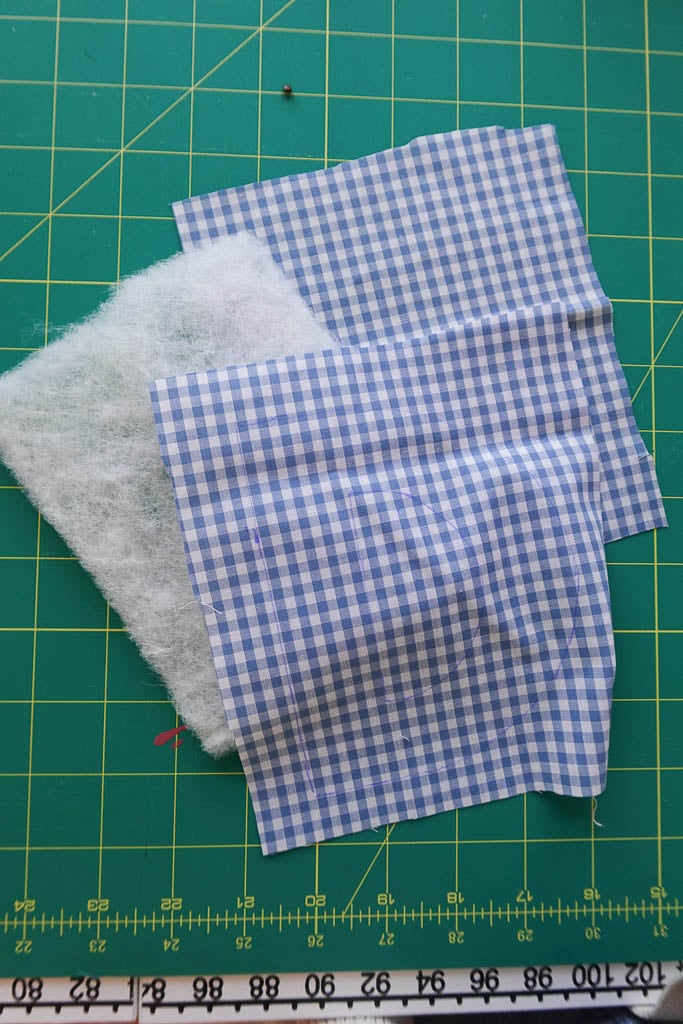
- Fabric – this is an amazing opportunity to use up some of those fabric scraps you have laying around. I used primarily cotton and linen scraps from old projects.
- Matching thread
- Letter template (download here)
- Fabric shears or a rotary cutter
- Sewing machine
- Embroidery floss – We will use this to hang the diy letter banner. You can use anything else you have (twine, yarn, etc.), embroidery floss is just something I always have on hand!
- Pins
- High-loft batting – we’re going to use this to fill the insides of our letters.
- Iron
- Heat-erasable pens – not required, but highly recommended for tracing your letter template.
- Pinking shears – not required, but it looks nice to have a fun pair of scissors to trim the edges of the letters.
Now that you have your supplies, let’s get into the how-to!
How to Sew a DIY Letter Banner
Step 1: Print Your Letter Templates
You can download the FREE letter template here! Simply print onto regular 8.5 x 11 paper and cut your shapes out.
IMPORTANT: As with any sewing pattern, please make sure your printer settings are set to “100% scale” before printing! Anything else will alter the size of the letters.
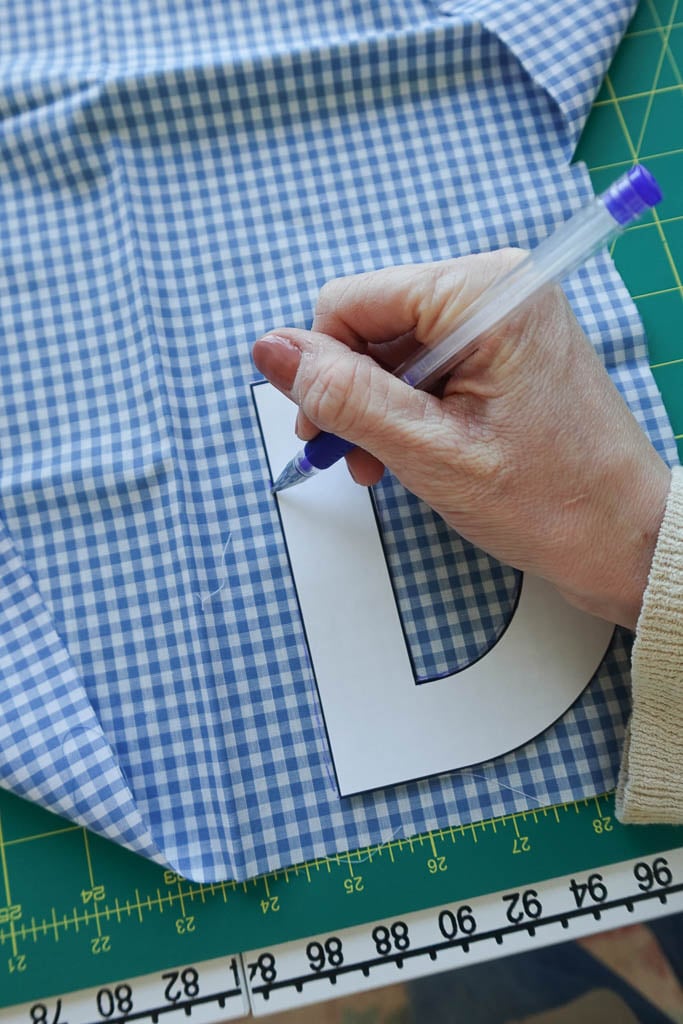
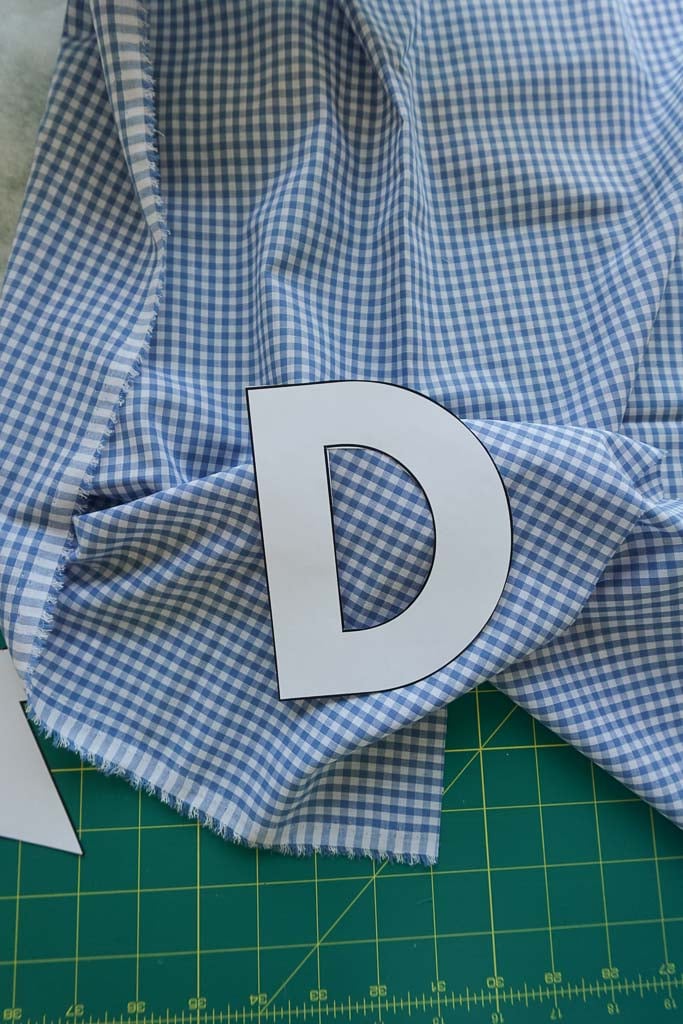
Step 2: Trace the letter onto your fabric
Next, we will trace our letters onto the fabric pieces. You’ll trace the letter onto the right side of the fabric, making sure to leave enough room on the sides for seam allowance (at least 1/2″ all the way around the letter).
You will need 2 pieces of fabric that are the same size (this will be the front and back of the letter), but you only need to trace on one side.
Scrap tip: This is the perfect time to use oddly shaped scraps that aren’t big enough for other sewing projects.
Step 3: Sandwich your batting between the fabric pieces and sew
Place your first (untraced) piece of fabric right side down on a table. Next, cut a piece of your batting to roughly the same size as your fabric pieces. Place this on top of your first fabric piece. Next, add your traced piece of fabric right side up over the batting.
Pin everything together and sew along your lines, making sure to backstitch in the beginning and the end.
Tip: Use a walking foot on your machine if you have one. This is also known as a quilting foot, and they are great for sewing anything with batting! If you don’t have one, don’t worry about it. It will still turn out beautifully!
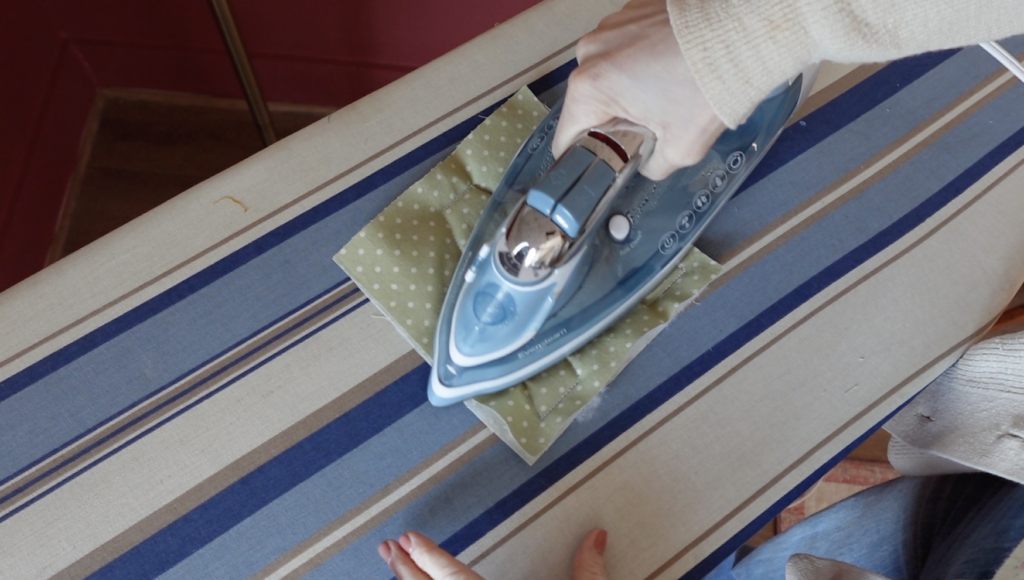
Step 4: Press
Press your seams before you cut with your pinking shears. I’ve found this results in a much cleaner cut!
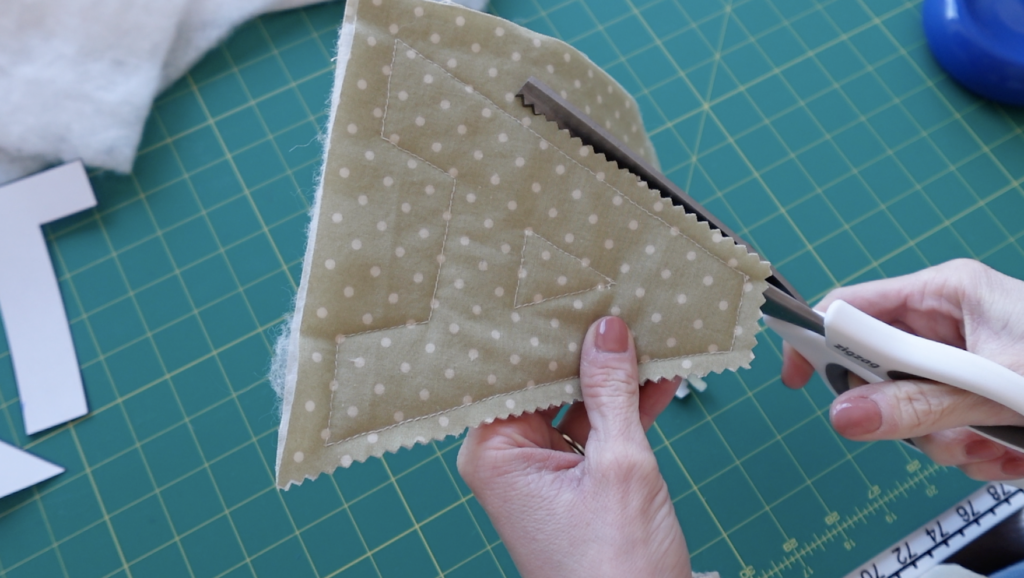
Step 5: Trim the edges with pinking shears
Use pinking shears or any decorative fabric shears to trim the edges down to about 1/4.” For the little inside pieces, I just trim with regular fabric shears.
Make sure you listen closely, this is one of the most satisfying sounds in all of sewing!
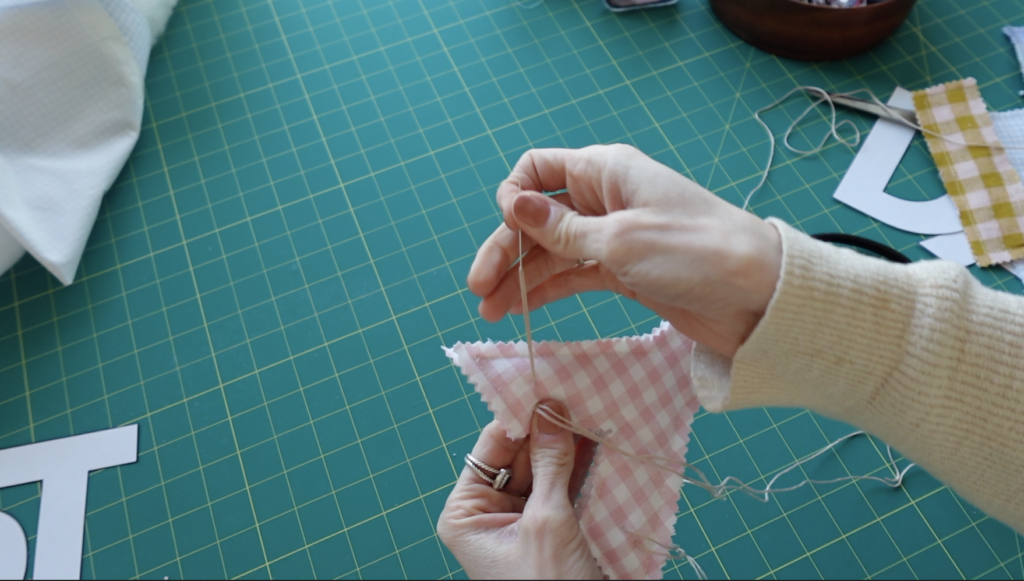
Step 6: String your DIY Letter Banner together
You can use really anything you’d like to bring your DIY letter banner together, but I prefer using embroidery floss just because I always have it laying around. Lay out your embroidery floss (or twine, ribbon, etc.) and evenly space the hearts. You can attach them in two ways:
Option 1: Sew Directly Onto the String
Stitch right behind the top of each heart, securing it to the floss.
Option 2: Glue
For a no-sew option, you can fabric-glue your hearts onto the floss/ribbon.
DONE!

Styling Tips
You can truly use this letter template for just about any sort of sign. Here are a few ideas:
- “Merry Christmas” for your mantle during the holidays
- Name signs for children’s rooms
- Valentine’s Day sign for a craft room
- “Happy birthday” to use as birthday decor (feels more memorable)
If you want some more diy garland/banner inspiration, check out this Valentine’s Day heart garland that I use in my home every year!
I plan to make a lot of these for all kinds of holidays. I hope this tutorial is helpful! If you have any questions, please leave a comment down below and I would be happy to get back to you. You can also tag me over on Instagram @sarahsdayoff so I can see all of your lovely letter banners!
Happy sewing!
Love,
Sarah
Leave A Comment