Homemade ice cream cake is a go-to for any time of the year. Who doesn’t love a cake of ice cream? Serve it for birthdays, celebrations, and really any occasion you can think of. The ingredients are simple and the results are delicious!
Homemade Ice Cream Cake
Here on the blog, you’ll find lots of cake and cupcake recipes, and cupcakes are always a go-to for me. But it’s time to combine 2 of the best desserts: cake and ice cream. Today we’re making a cake of ice cream!
I knew there was really only one way to make this happen: homemade ice cream cake. My deep-rooted love for ice cream has truly always been lingering over my head, and this year I finally decided to wave goodbye to boring old birthday cake and turn my attention towards what I really wanted. And that my friends, is ice cream. Who doesn’t love a giant cake of ice cream?
What is ice cream cake?
Picture this:
Remember the good old days when you’d pull up to Dairy Queen (when it was actually called Dairy Queen), hop out of the car and head inside for a hot dog after soccer practice? Picture this: you’re standing at the counter about to order your food and you look over to lay your eyes upon a giant freezer full of random boxes. You push through your siblings to grab a closer look and you see that these boxes actually contain the most genius of all desserts: ice cream cake. Little boxes containing a cake of ice cream. This is the part where you start begging your parents to let you have just a slice, or maybe the entire thing. They probably said no, but you’re absolutely positive that will be your birthday cake this year.
The original cake of ice cream
Technically, I do think that Dairy Queen was the first to master this delicacy of a dessert. But honestly I think this version I’m sharing with you today is going to push that memory of an ice cream cake to the back burner.
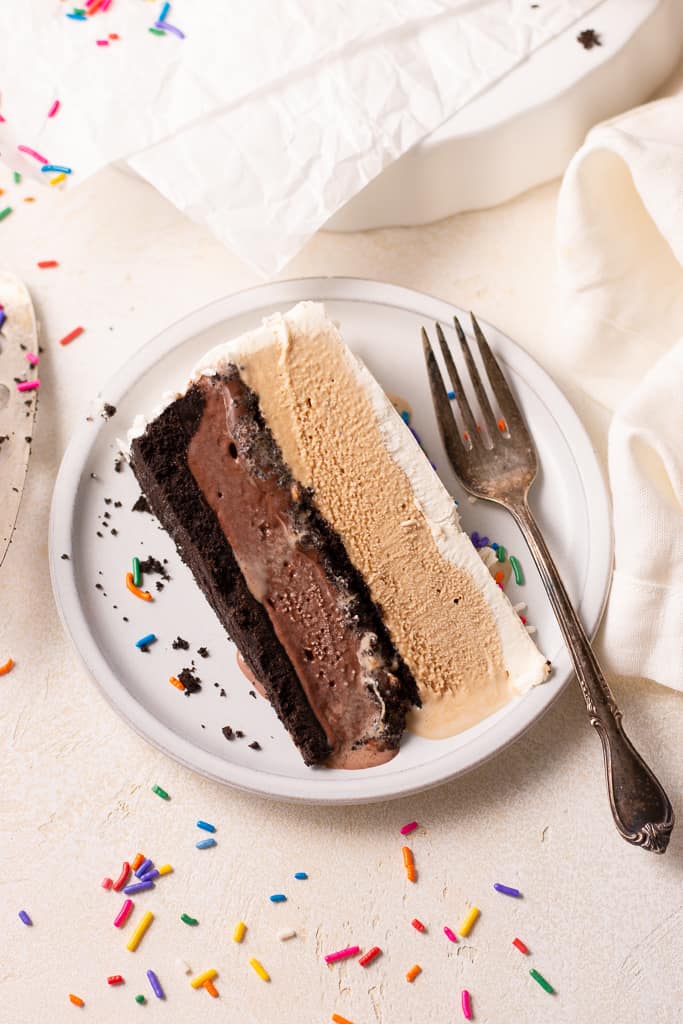
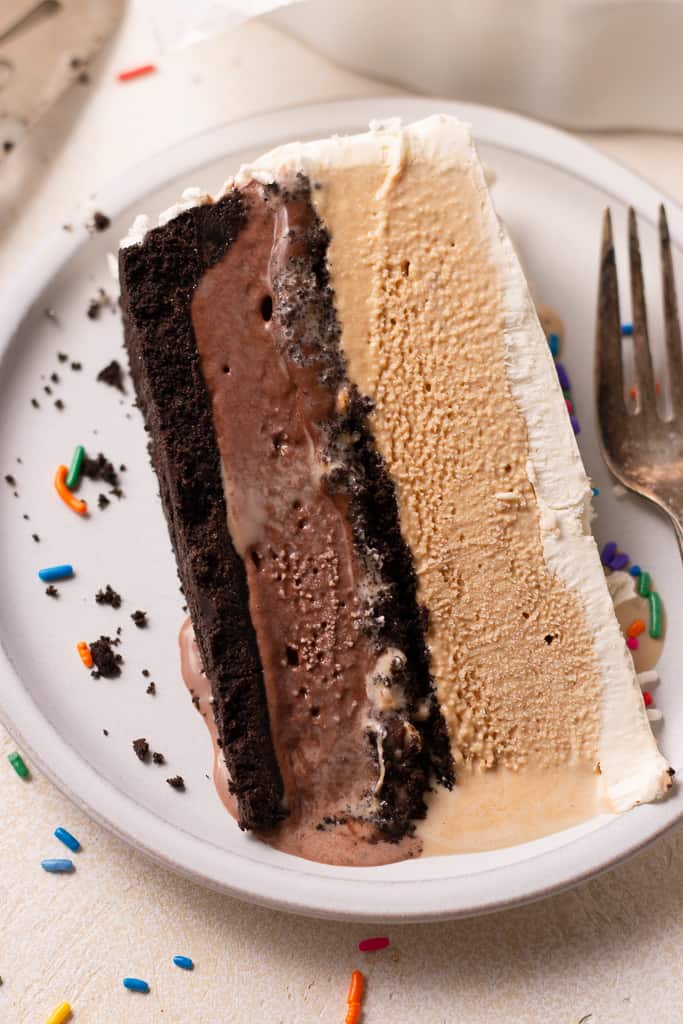
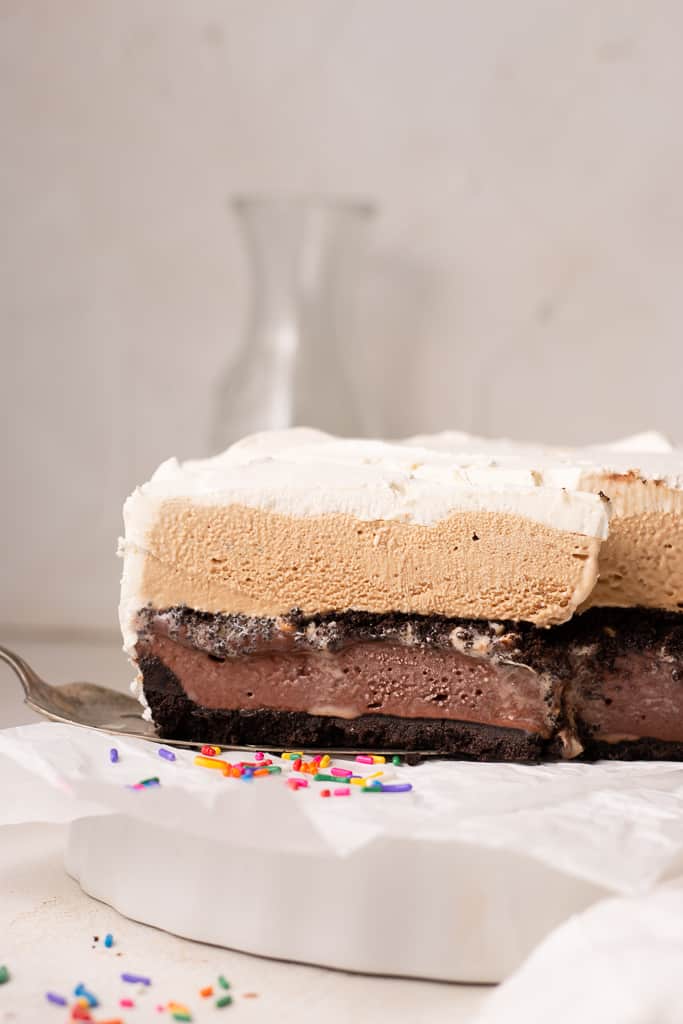
The beauty of a cake like this is you can use whatever flavors you love. I happen to adore coffee ice cream and chocolate ice cream, so that’s what I used for my homemade ice cream cake, but truly the possibilities are endless!
Equipment you may need…
- 9-inch springform pan: you’ll need a springform pan for this recipe, and these are great for lots of things in the kitchen – so it’s always good to have one on hand!
- Food processor or blender: I love my food processor attachment from Vitamix. It does the job with just about anything, and you can also try using the blender attachment to crush the oreos for the crust.
- Sheet pans: just a universal pan that every baker needs.
- Mixing bowls: I love these glass mixing bowls from Amazon. They’re especially perfect for food photography.
- Wooden spoon: I only use wooden spoons and rubber spatulas when I’m baking, and I love these!
- Measuring cups/spoons: I’ve been linking these in all of my posts because I love them SO much! They are beautiful and look just like some other expensive ones on the market (but wayyy cheaper).
Ingredients for DIY Ice Cream Cake
- Oreos (or another chocolate wafer cookie)
- Unsalted butter
- Kosher salt
- Chocolate ice cream
- Coffee ice cream
- Toffee bits
- Hot fudge sauce
- Heavy cream
- Powdered sugar
- Pure vanilla extract
Tips for making Homemade Ice Cream Cake
- Softening your ice cream. Trust me on this one – you do not want to try and work with rock solid ice cream in this recipe. You want the ice cream to spread into an even layer easily. I like to take the entire container out of the freezer and let it sit on the counter for about 20 to 30 minutes. Then, I transfer all of the ice cream to a large bowl and begin stirring it with a spoon until I get it into a consistent, spreadable mixture. It’s still frozen at this point, but it’s more workable than completely frozen ice cream is.
- Use store-bought ingredients. I’m a person that’s always for making everything homemade, y’all know that! BUT, I know everyone out there has their absolute favorite ice cream brands that would be great options for your homemade ice cream cake. Now don’t get me wrong, you could make your own ice cream, fudge sauce, and toffee, but the cake already takes about a few hours to assemble (between all the freezing time), so I didn’t see the need to add any extra time or effort. Trust me on this: the cake tastes magical with simple, store-bought ingredients.
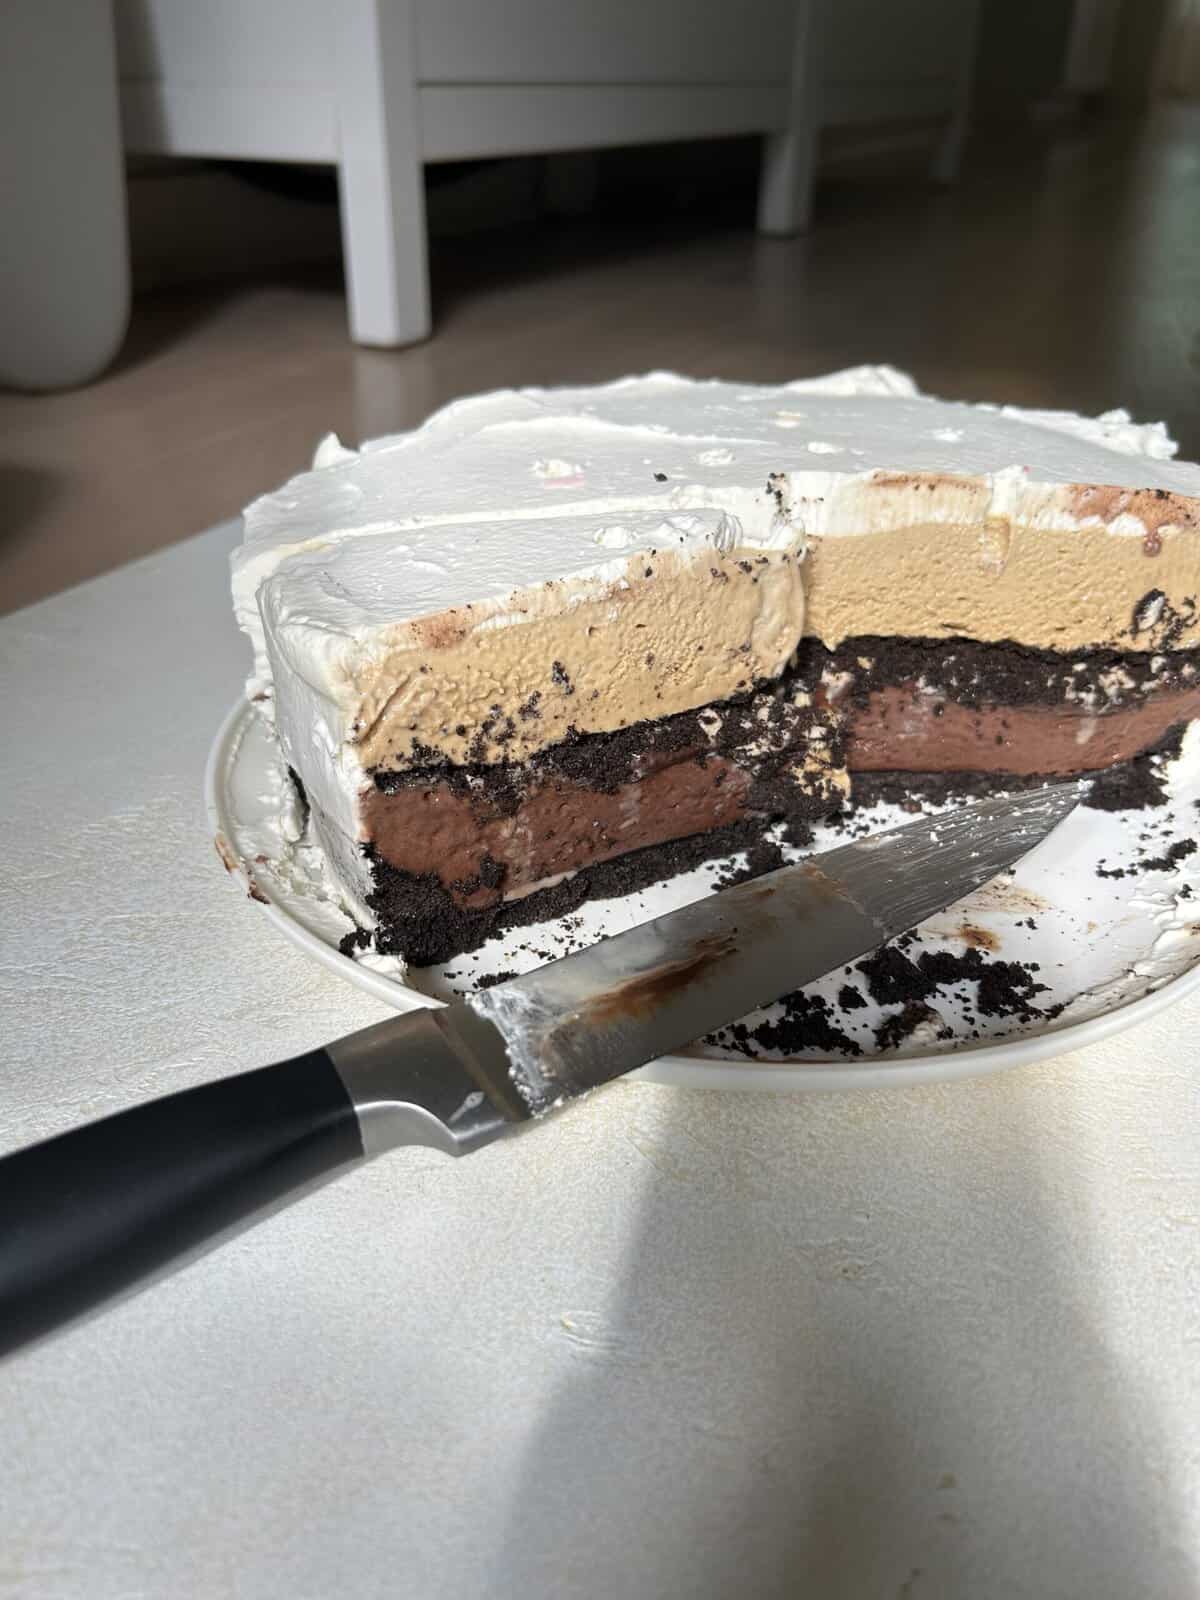
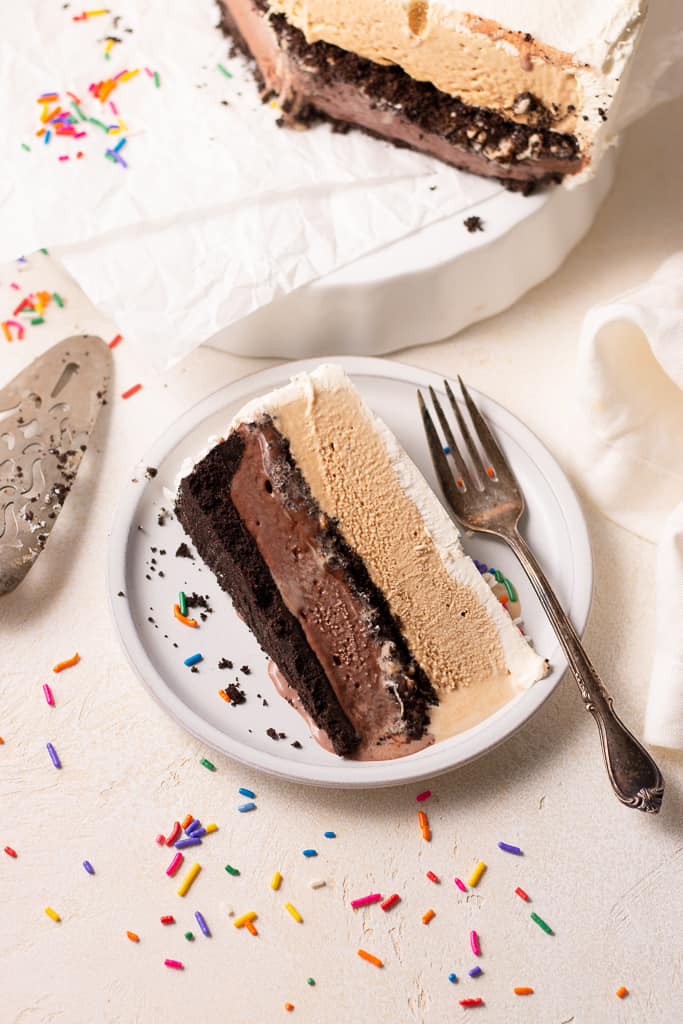
- To slice: I like to run a sharp knife under hot water before I begin slicing into the cake. This way you’ll get a nice, clean slice of homemade ice cream cake every time!
Flavor options:
I love the combination of coffee and chocolate, but here are a few other ideas I had for flavor combos!
- Chocolate peanut butter: chocolate ice cream, oreo crust, crushed peanuts, and peanut butter ice cream
I like to pull inspiration from other recipes when combining flavors – like these Chocolate Peanut Butter Cupcakes. The flavors go together so well in cupcakes, and they’re great in a homemade ice cream sandwich too!
- Lemon shortbread: Vanilla ice cream, lemon ice cream, shortbread cookie crust, and shortbread cookies in the center
Lemon Biscoff Ice Cream – another recipe to pull some inspiration from. Lemon and Biscoff go so well together, especially in a cake full of ice cream!
- Salted caramel: Vanilla ice cream, salted caramel ice cream, graham cracker crust, chopped chocolate, and salted caramel drizzle in the middle
If you want to make homemade caramel for this cake, check out this blog post on How to Make Homemade Caramel. I walk you through the step-by-step process of making homemade caramel at home with no fuss!
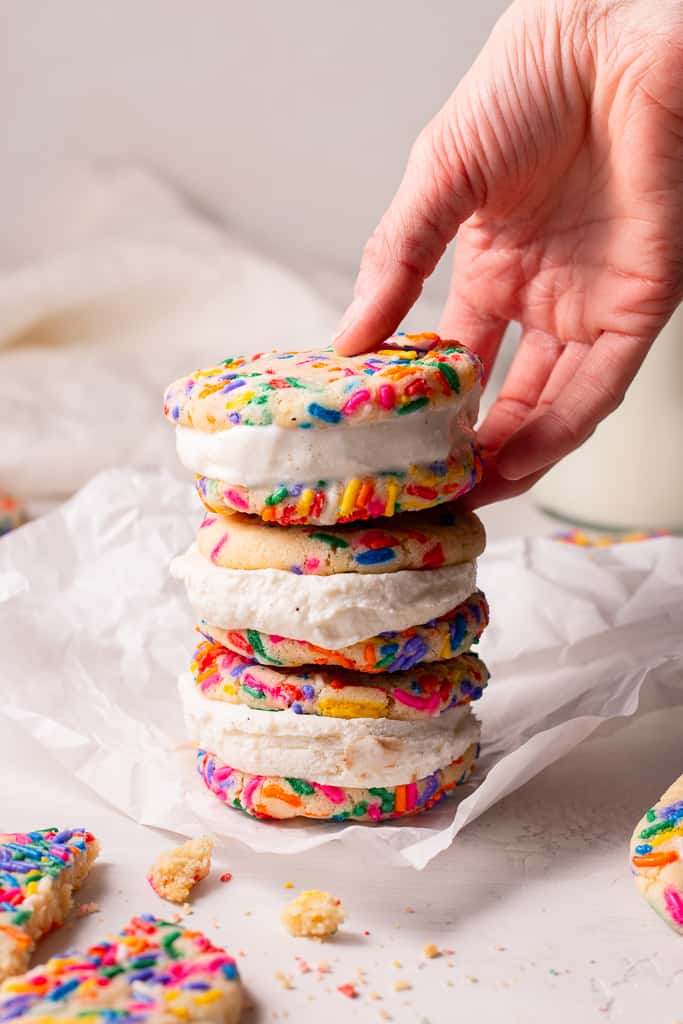
Feel free to add lots of sprinkles to your cake of ice cream, kind of like I’ve done with these Funfetti Ice Cream Sandwiches. You can add the sprinkles to the outside of the diy ice cream cake or fold them into the ice cream for more fun!
Can I make homemade ice cream cake ahead?
YES!!!!! This is truly one of my favorite things about this homemade ice cream cake recipe. It keeps for a really long time because it’s pretty much just a cake of ice cream! You can make the cake days in advance, and you can even make this whipped cream the day before you serve it as well. When you’re ready to serve it, just remove it from the freezer and spread the whipped cream over it.

How to Store Homemade Ice Cream Cake:
If you’re storing the homemade ice cream cake before you’ve added the whipped cream
Simply store it, covered, in the springform pan. When you’re ready to serve it just remove it from the freezer and spread fresh whipped cream over it.
If you’re storing the ice cream cake after you’ve added the whipped cream
That’s the beauty of this cake, it keeps for a looooong time. I keep my cake on a large plate and just stick it straight in the freezer. You can try and cover the whole thing in plastic wrap, but things get a little tricky when you do that. When you want a slice, you’ll just remove it from the freezer and slice it up!
This homemade ice cream cake recipe was such a fun one for me to work on, and I hope you all love it as much as I do! It will forever have me coming back for more… happily.
Feel free to always reach out to me via email (sarah@sarahsdayoff.com), through my Instagram DMs (@sarahsday0ff), or by leaving a comment on one of these posts. I’m happy to answer any questions I can!
“Now all glory to God, who is able, through his mighty power at work within us, to accomplish infinitely more than we might ask or think. Glory to him in the church and in Christ Jesus through all generations forever and ever! Amen.” -Ephesians 3:20-21-
Here are some of the pics from my birthday dinner! The cake was very much enjoyed by everyone 🙂


Ice Cream Cake
Ingredients
- 44 Oreo cookies (see note)
- 1/2 tsp kosher salt
- 7 Tbsp unsalted butter melted
- 2 quarts chocolate ice cream
- 1/3 cup hot fudge sauce
- 3/4 cup toffee bits
- 2 quarts coffee ice cream
- 2 cups heavy cream
- 1/4 cup powdered sugar
- 2 tsp pure vanilla extract
Instructions
- Grease a 9-inch springform pan with cooking spray. Line with plastic wrap (do the best you can to cover all the sides and the bottom.
- Remove the filling from each Oreo cookie. Discard the filling (or reserve for another use), and place the cookies in a food processor.
- Add the salt to the food processor and pulse until cookies resemble fine crumbs. Add melted butter and pulse 10 to 15 more times until the mixture begins to come together on one side of the bowl.
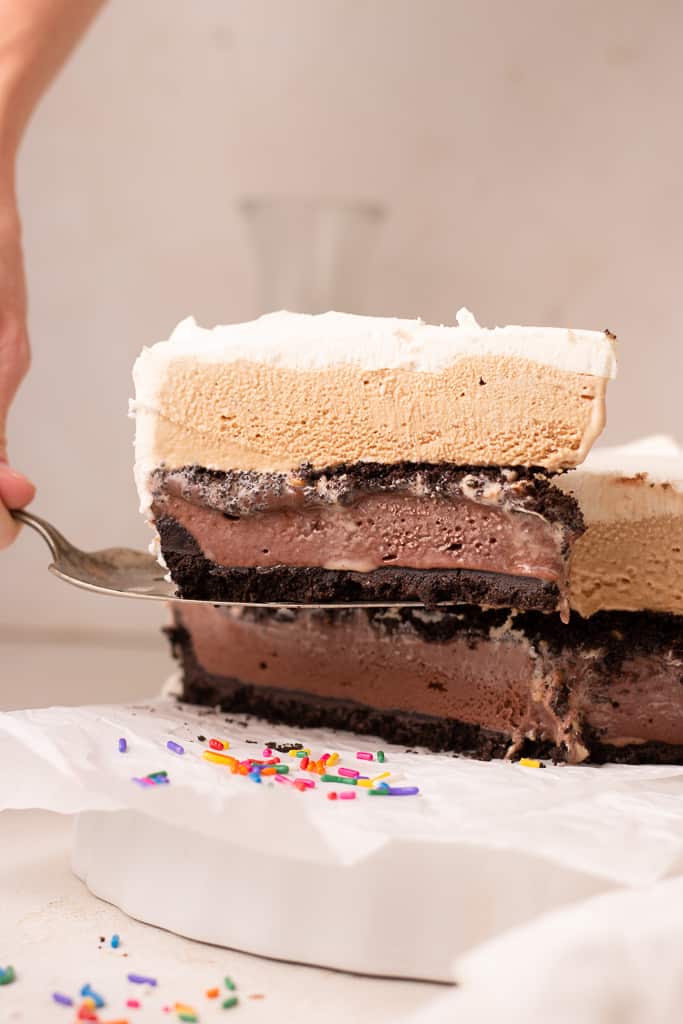
- Press 3/4s of the Oreo mixture into the bottom and slightly up the sides of the prepared pan, making sure you're pressing into an even layer. Reserve the remaining 1/4 of the mixture. Place the entire pan in the freezer for at least 30 minutes.
- Meanwhile, take the chocolate ice cream out of the freezer and let it sit on the counter for 20 to 30 minutes to soften. Use an offset spatula to spread the chocolate ice cream into an even layer over the crust. Freeze for at least 1 hour.
- Remove the pan from the freezer and spread fudge sauce in an even layer over the chocolate ice cream. Sprinkle with toffee bits and remaining oreo crumbs. Freeze for at least 30 minutes.
- Meanwhile, take the coffee ice cream out of the freezer and let it sit on the counter for 20 to 30 minutes to soften. Use an offset spatula to spread the coffee ice cream into an even layer over the fudge sauce layer. This is your final layer, so make sure it's nice and even on the top.
- Freeze the entire cake for at least 4 hours, but preferably overnight.
- When you're ready to serve the cake, beat the cream, sugar, and vanilla in a small bowl with a mixer or whisk until medium peaks form. Use an offset spatula to spread the whipped cream all over cake. Freeze for 30 minutes more before Slicing and serving.
Notes
This blog post contains affiliate links which make me a small commission at no cost to you. Thank you for supporting Sarah’s Day Off!


Hey Sarah! I was so disappointed that Nabisco discontinued their chocolate wafers. My mom used to make a delicious very quick but elegant whipped cream chocolate wafer desert in straight sided wine glasses. For my ice cream cake I found 2 different companies that now make the chocolate wafers. Dewy’s is the tastiest brand.
I was disappointed too! I don’t think they considered how many of us bakers loved them for icebox cakes! I’ve seen Dewy’s on Amazon I believe, but haven’t tried them yet. I’m glad to see that you’d recommend them! I’ll definitely be trying these out next time. Thanks for the advice!
Also, that dessert tastes amazing!!
[…] Homemade Ice Cream Cake (Cake Made of Ice Cream) – Sarah’s Day Off – https://sarahsdayoff.com/my-ice-cream-birthday-cake/ […]