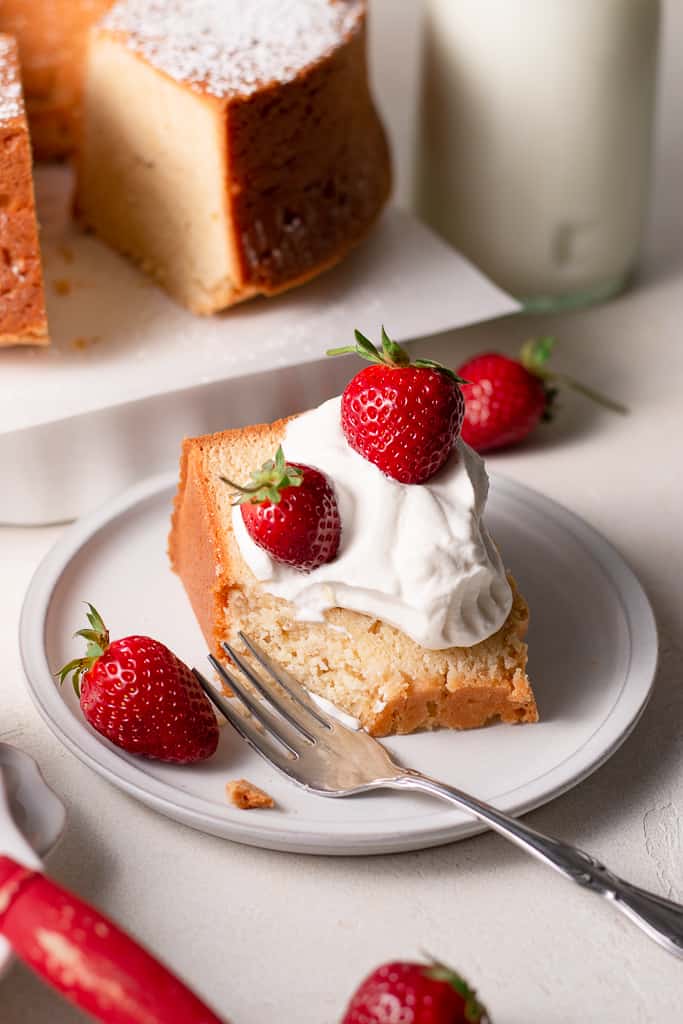
This dense and super moist pound cake is the perfect spring dessert. Serve it with fresh seasonal berries and a dollop of perfect whipped cream.
All-Butter Pound Cake
Ok y’all, surely I’m not the only one who remembers the boxed pound cake growing up, or the frozen pound cake you always tried to swipe from the freezer section of the grocery store before your mom caught you. I’m can’t be the only one, right?!
I will never hate on those pound cakes, and honestly, I use the frozen pound cakes a lot for trifle recipes or just basic desserts where I need a pound cake in a pinch. The flavor is incredible and the results are always perfect!
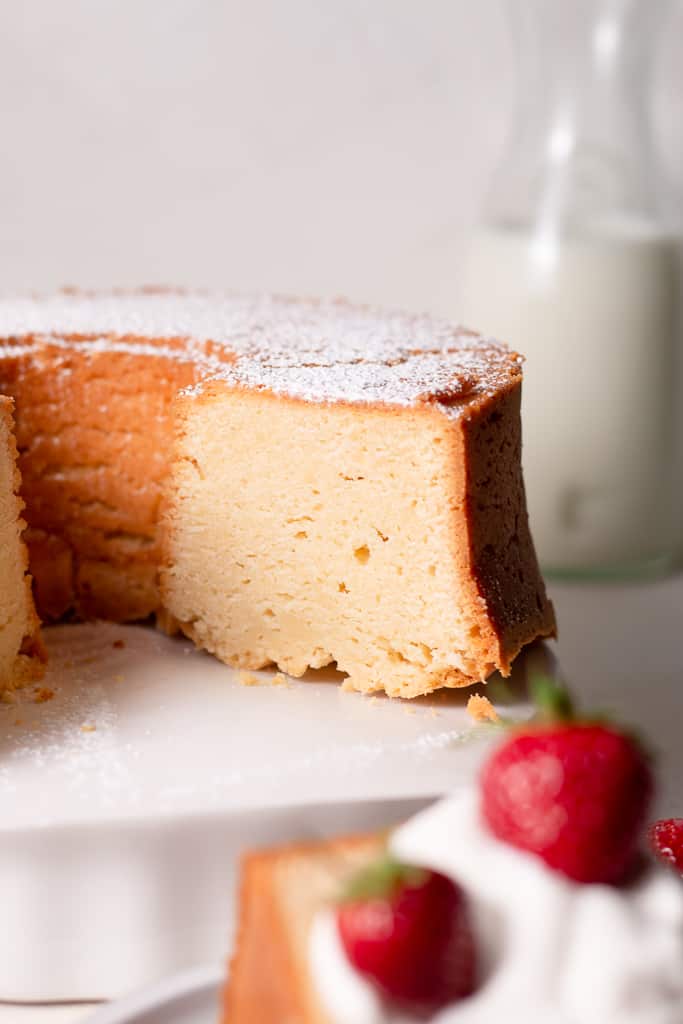
BUT. You guys knew there was a but coming lol. I can’t tell you guys how much I adore this homemade pound cake recipe. It’s smooth, dense, and super moist on the inside (just like a pound cake should be), and we serve this at almost all of our family get-togethers simply because: it’s a crowd pleaser.
What is Pound Cake?
I’m embarrassed to say that I didn’t know this for the longest time.. pound cake is exactly what it sounds like. It’s traditionally made with 1 pound of each of 4 ingredients: butter, flour, sugar, and eggs. You may be thinking: that’s a lot of butter, flour, sugar, and eggs. And you’re absolutely right. But that’s what makes it so delectable.
Recipes have changed and adapted from the good ole days, but I can tell you that a classic pound cake is something that needs no changing. This recipe is inspired by my husband’s grandmother’s recipe. It’s simple, straight to the point, and is sure to put a smile on everyone’s face. I will say, her original recipe card had about 2 sentences worth of instructions. I tried to include some more for y’all so you don’t get lost somewhere along the way!
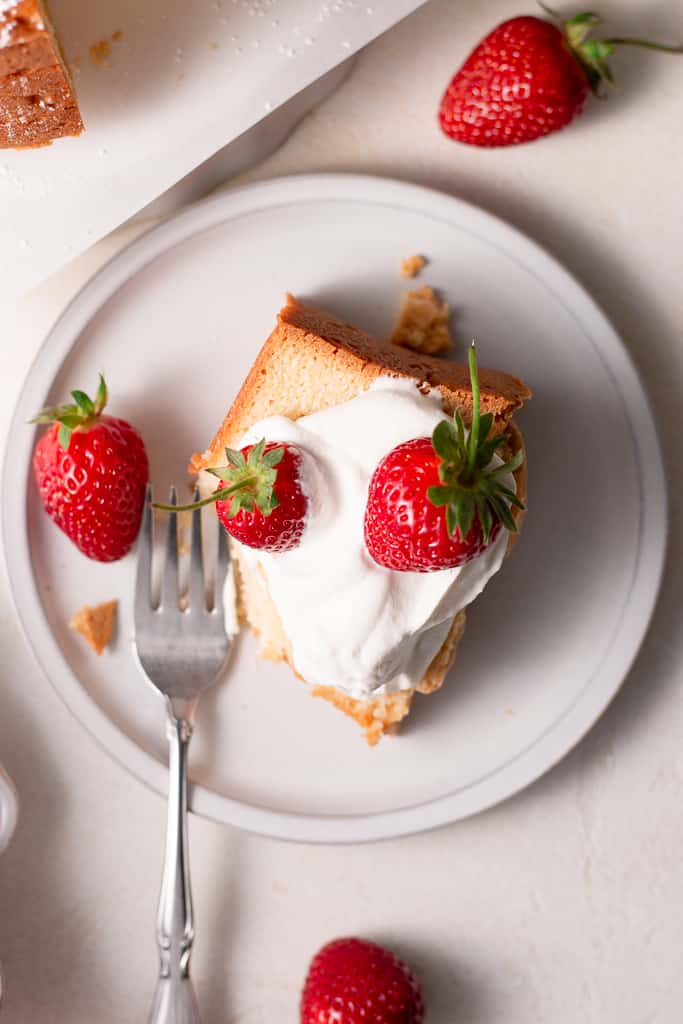
I like to serve this cake with a dusting of powdered sugar, a dollop of perfect whipped cream, and fresh seasonal berries. We actually just went strawberry picking a few weeks back so that’s what you see in the photos. And let me tell you… fresh strawberries when they’re in season will always be better than anything you buy at the grocery store.

Some equipment you may need…
- Tube pan: I like to bake this cake in a classic tube pan, but you can use a loaf pan, or even a bundt cake pan instead.
- Stand mixer: this is the one I have and I love it! I’ve had it for years now and I’ve never had any trouble with it. You definitely don’t “need” a stand mixer for this recipe, but it sure does make life a lot easier.
- Offset spatula: the best little utensil for almost any baking project. I find myself reaching for this one allll the time in the kitchen. It’s so helpful to use when spreading the frosting onto the layers.
- Measuring cups/spoons: I’ve been linking these in all of my posts because I love them SO much! They are beautiful and look just like some other expensive ones on the market (but wayyy cheaper).
- Mixing bowls: I love these glass mixing bowls from Amazon. They’re especially perfect for food photography.
Ingredients for this Cake
- All-purpose flour
- Kosher salt – I use Diamond Crystal Kosher Salt always. This is also something I’d suggest using as the sodium content can vary across brands.
- Granulated sugar
- Unsalted butter
- Eggs
- Cream cheese
- Vanilla bean paste – now is not the time for artificial vanilla. Since this cake is all about the vanilla, I suggest using a high quality one!
- Powdered sugar
- Heavy cream

My Kitchen Tips:
- Use vanilla bean paste. I love using vanilla bean paste in my recipes because it adds incredible flavor and little specks of vanilla beans. It can be a little bit pricey, but it’s worth splurging on for this pound cake recipe!
- Do not overbeat your batter. Just like my Vanilla Cake Recipe! This is a pound cake must. If you over beat your batter, not only will you cause too much gluten to form in the flour (resulting in a tough cake), you’ll also whip too much air into the batter. Because this recipe does not have a leavening agent (such as baking powder or baking soda), if you whip too much air into it in the beginning it will rise up quite a bit when it hits the heat, then collapse shortly after. Just beat everything until it’s just incorporated and you’ll be fine 🙂
- Grease & flour your pans. This is critical! I highly recommend dusting your cake pan with flour because this will give the cake some stability as it rises in the oven.
- Do not open the oven. If you open your oven before the cake has had the chance to set up completely, the cold air entering the oven will cause the cake to collapse. That doesn’t make for such a yummy cake.

How to Store
This may be an unpopular opinion, and it may not be considered “food safe” necessarily, but I like to keep my pound cake on a cake stand – that has a cover around it – out on my counter. It won’t keep like this for very long, but I just think the texture of a refrigerated pound cake is just different. I usually keep mine out for about 3 to 5 days, or until I feel like it’s no longer at its prime.
You can also wrap your whole cake really well in plastic wrap and freeze it for up to 3 months. Just let it thaw out to room temperature before you serve it.
I hope you all love this cake as much as I (and my family) does. Feel free to always reach out to me via email (sarah@sarahsdayoff.com), through my Instagram DMs (@sarahsday0ff), or by leaving a comment on one of these posts. I’m happy to answer any questions I can!
If you make this recipe be sure to tag me @sarahsdayoff so I can see them!
“Cast all your anxiety on him because he cares for you.” -1 Peter 5:7-

Classic Pound Cake
Ingredients
- 1 1/2 cups (3 sticks) unsalted butter, plus more for greasing the pan at room temperature
- 1 (8-oz) block cream cheese at room temperature
- 3 cups granulated sugar
- 6 large eggs at room temperature
- 1/2 tsp kosher salt
- 3 cups all-purpose flour, plus more for coating the pan
- 1 1/2 tsp vanilla bean paste (or use pure vanilla extract)
Instructions
- Grease a large tube pan (or bundt pan) with a thin layer of softened butter. Dust with flour and set aside.
- Beat butter, cream cheese, and sugar in the bowl of a stand mixer fitted with the paddle attachment on medium speed for 2 minutes. Stop the mixer and scrape down the sides of the bowl.
- Turn the mixer to low speed and beat in eggs, one at a time, allowing each to fully incorporate before adding the next. Once the last egg is mixed in, stop the mixer and scrape down the sides of the bowl.
- Beat in salt. Add flour, 1 cup at a time, mixing on low speed for 15 seconds between each addition. Beat in vanilla bean paste until fully incorporated.
- Spoon batter into prepared pan, using an offset spatula or knife to spread into an even layer. Place the pan in a cold oven on the center rack, and set the temperature to 275°. Bake for 2 hours.
- Do not open the oven before 2 hours has gone by. Once you get to that point, you can open the oven and insert a knife or a cake tester into he center of the cake. If it comes out clean with only a few large crumbs, the cake is done.
- Allow cake to cool completely in the pan before turning out onto a rack. Serve warm or at room temperature with whipped cream and fresh berries.
This blog post contains affiliate links which make me a small commission at no cost to you. Thank you for supporting Sarah’s Day Off!
If you love this recipe, be sure to check out these other cake recipes while you’re at it!


Hi, Thanks for this great recipe. Hoping to try it soon. Just wondering. Why did you choosr to not preheat the oven like it’s always mentioned in cake recipes and chose to use a cold oven rather? Does it help improve the texture of the cake? Would love to know.
Hi Lakshmi! This is a great question. You’ll see this a lot in pound cakes because we want the cake to rise as slowly as possible in the oven (this lends to the classic dense texture). If the oven were already preheated, as soon as the batter hit the heat it would begin to expand and rise slightly from the air whipped into the butter and eggs. I just didn’t want the cake to rise quickly and then collapse. By putting the cake in a cold oven, it’s able to warm up very slowly and rise evenly with no risk of deflation. Hope this helps!