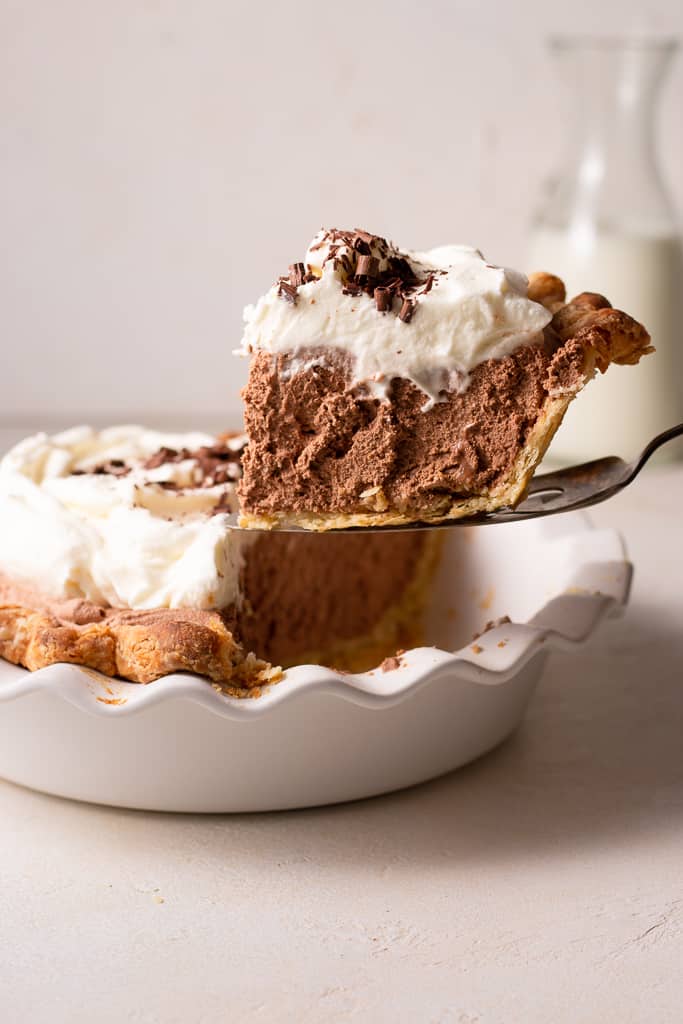
Crispy pie crust filled with a luscious, chocolatey filling and topped with the smoothest whipped cream. This French Silk Pie is what dreams are made of.
French Silk Pie
French Silk Pie is just the ultimate pie. And I don’t really think I need to say much more about it because it’s the culmination of everything you want in a pie: rich, luscious, smooth, all while being exceedingly delicate at the same time. I wanted this pie to be a go-to in everyones kitchen, and I have a really good feeling that it will be.
I think I’ve told y’all in a previous blog post that I’ve never really been a fruit pie gal until more recently. There was just always something about cooked fruit that never sat well with me when I was younger. Now, of course, I’m beginning to see the beauty in warm fruit against crispy pie crust, a true match made in heaven. But, let it be known that my true first love when it comes to pie was French Silk Pie, and for good reason.

What is French Silk Pie
This is a pie that will render itself unforgettable in your mind. The French got it right in the name by calling it a “silk” pie. It’s truly smooth, silky, and all the things you want it to be. The balance of buttery, crispy pie crust against the smooth, luscious chocolate filling and a lighter than air whipped cream are what make this pie so special and so memorable.
Thanks to this French silk pie, we’re now officially pie people in our home, and I’m not upset about it in the slightest.

Equipment you may need…
- Food processor: this is definitely not a must-have, but it helps make the process a lot simpler and easier. Just a basic one will do.
- Pastry blender: if you’re not using a food processor, I’d definitely recommend having one of these on hand to cut the butter into the flour.
- Rolling pin: this is the one I use for everything. It’s only $7 and it does the job. I prefer using rolling pins without handles on the ends so I get more even pressure.
- Mixing bowls: I love these glass mixing bowls from Amazon. They’re especially perfect for food photography.
- Wooden spoon: I only use wooden spoons and rubber spatulas when I’m baking, and I love these!
- Measuring cups/spoons: I’ve been linking these in all of my posts because I love them SO much! They are beautiful and look just like some other expensive ones on the market (but wayyy cheaper).
- Liquid measuring cups: every baker needs one of these in their kitchen. You should never use a dry measuring cup to measure liquid ingredients – the amounts may vary slightly. I recommend this set of 3 – they’re perfect for your kitchen!
- Parchment Paper Sheets: I do and always will buy my parchment paper in sheets from Amazon. I would never ever go back to the rolls because they’re just soooo much easier to work with. Order some and I promise you’ll agree!

Ingredients for French Silk Pie
- All-purpose flour
- Granulated sugar
- Kosher salt
- Buttermilk
- Unsalted butter
- Heavy cream
- Bittersweet chocolate
- Large eggs
- Pure vanilla extract
- Brewed coffee
Tips for Making French Silk Pie
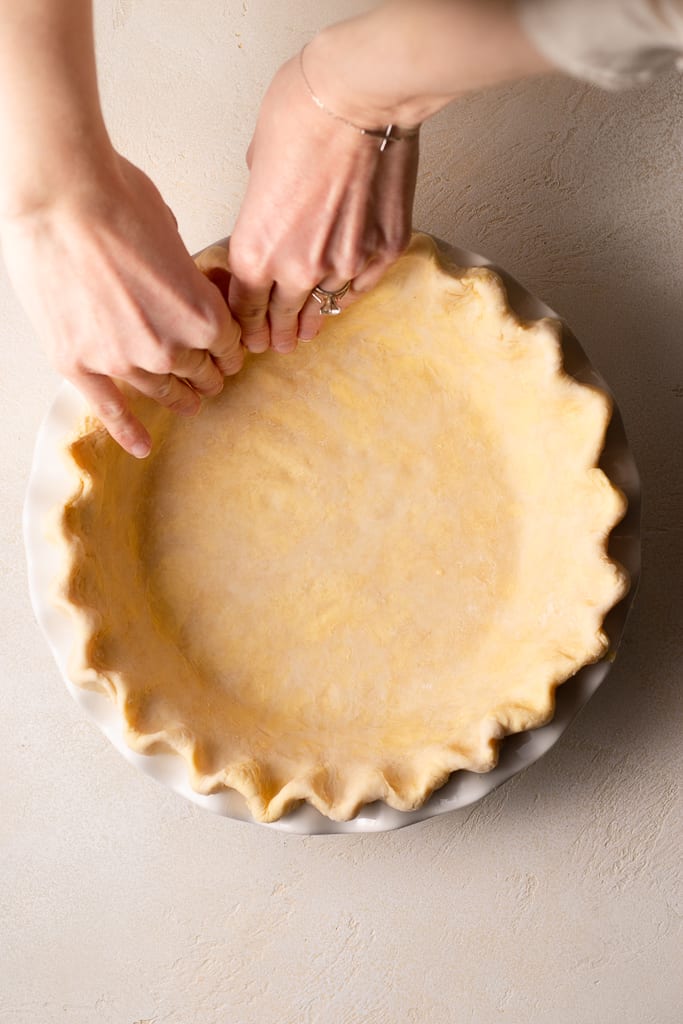
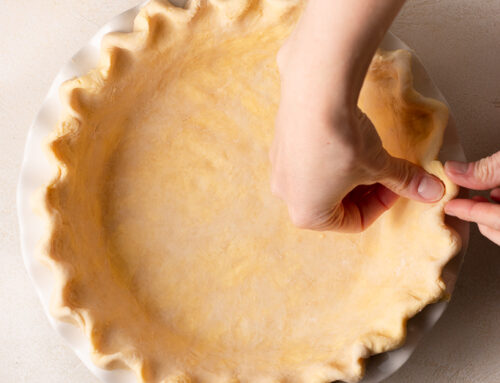
- Read my Pie Crust 101 post! I go in detail about the ins and outs of making your own pie crust. Homemade dough truly makes a difference in this recipe, so I highly recommend you give it a shot. Of course, if you’re in a pinch feel free to use a store-bought crust, but I think you’ll be wayyyy happier with the outcome of this recipe if you make your own.
- Don’t forget the coffee!! There’s just something about the combination of chocolate and coffee that creates sort of a dance in your taste buds. Coffee makes chocolate taste more like… well, chocolate. It only enhances the flavor and makes it taste more like itself. I add coffee to almost every chocolate recipe I make (like my best ever chocolate fudge brownies), and once you try it I think you will too.
- Don’t whip the cream too fast. As with anytime you’re making whipped cream, it can be so so tempting to set your hand mixer or stand mixer on full blast so it whips up faster, and to be completely honest that’s what I used to do! UNTIL I whipped it by hand once because I was too lazy to get out my hand mixer (not sure this makes sense, but oh well). If you’re the brave soul who also spends 10 minutes whisking cream by hand until you reach stiff peaks you’ll probably realize that your cream will have a perfect consistency. This is because if you whip it too hard, too fast, the air bubbles you create will not be stable and they’ll deflate extremely quickly. Low and slow is the key to great whipped cream (and it’s especially important in a French Silk Pie recipe).

Can I store this pie?
Yes! That’s the beauty of a refrigerated pie – it keeps extremely well. You can store this French Silk Pie in the refrigerator in an airtight container (I like to use a cake transporter) for 3 to 4 days. Assuming you’ve whipped your cream low and slow (as I described above), it should remain stable for days.
Can I make French Silk Pie ahead?
You can make the pie crust in advance for this pie, and also the filling up to the point where you fold in the whipped cream to the chocolate mixture. On the day you serve, simply whip the cream for the filling and for the topping and go on from there.
That’s all for me now friends 🙂 I hope you all love this recipe as much as we do around here. If you make it, be sure to tag me @sarahsdayoff so I can see it!
Love,
Sarah
“Remember this: whoever sows sparingly will also reap sparingly, and whoever sows generously will also reap generously.” -2 Corinthians 9:6-

French Silk Pie
Ingredients
For the Pie Crust
- 1 batch homemade pie crust (linked above)* fully baked
For the Filling
- 1 cup heavy cream
- 2 Tbsp warm heavy cream
- 1 tsp instant coffee
- 6 oz bittersweet chocolate broken into pieces
- 3 large eggs
- 1 cup granulated sugar
- 3/4 cup (1 1/2 sticks) unsalted butter at room temperature
- 2 tsp pure vanilla extract
- 1/4 tsp kosher salt
For the Whipped Cream topping
- 1 cup heavy cream
- 2 Tbsp powdered sugar
- 1/2 tsp pure vanilla extract
- Pinch of salt
Instructions
For the Homemade Pie Crust
- Make 1 batch of homemade pie dough and fully bake the crust. You can find all the instructions for doing this here.
For the Filling
- Add cream to a large bowl. Beat on medium-low speed with a hand mixer or stand mixer until stiff peaks form, usually around 7 to 10 minutes (it's important that you take your time on this in order to have a stable whipped cream). Set the bowl in the refrigerator until it's ready to use.
- Stir warm cream and instant coffee together in a small bowl; set aside.
- Add chocolate pieces to a small saucepan set over low heat. Stir the chocolate occasionally just until it's fully melted. Remove from heat and set aside.
- Whisk eggs and sugar in a large heat proof bowl 1 minute or until smooth and slightly pale in color.
- Bring 1-inch of water to a simmer in a saucepan set over medium heat. Set the bowl with the egg mixture over the simmering water, making sure the bottom of the bowl doesn't touch the water (we're going to use the steam to heat the eggs).
- Heat the eggs and sugar, whisking constantly, until the mixture reaches 160°F. Remove from heat immediately and cool at room temperature, stirring occasionally, for 10 minutes.
- Whisk chocolate into egg mixture, being sure to scrape all the chocolate into the bowl. Whisk in cream/instant coffee mixture, vanilla, and salt. Let cool at room temperature an additional 10 minutes.
- Meanwhile, beat the butter on high speed in the bowl of a stand mixer fitted with the paddle attachment 3 minutes or until pale in color.
- With the mixer running on low speed, slowly stream the chocolate and egg mixture into the butter. Increase speed to high and beat an additional 3 minutes.
- Gently fold the chilled whipped cream into the chocolate mixture until it's fully combined.
- Add the filling to the cooled, fully-baked pie crust, cover with plastic wrap, and chill at least 4 hours or until slightly firm to the touch.
For the Whipped Cream Topping
- Combine cream, powdered sugar, vanilla, and salt in a large bowl. Beat on medium-low speed with a hand mixer, stand mixer, or whisk until stiff peaks form, usually around 7 to 10 minutes (it's important that you take your time on this in order to have a stable whipped cream).
- Dollop cream over chocolate filling. Use a vegetable peeler to shave chocolate pieces over the cream.
Notes


Leave A Comment