Leftover Halloween Candy Brownies
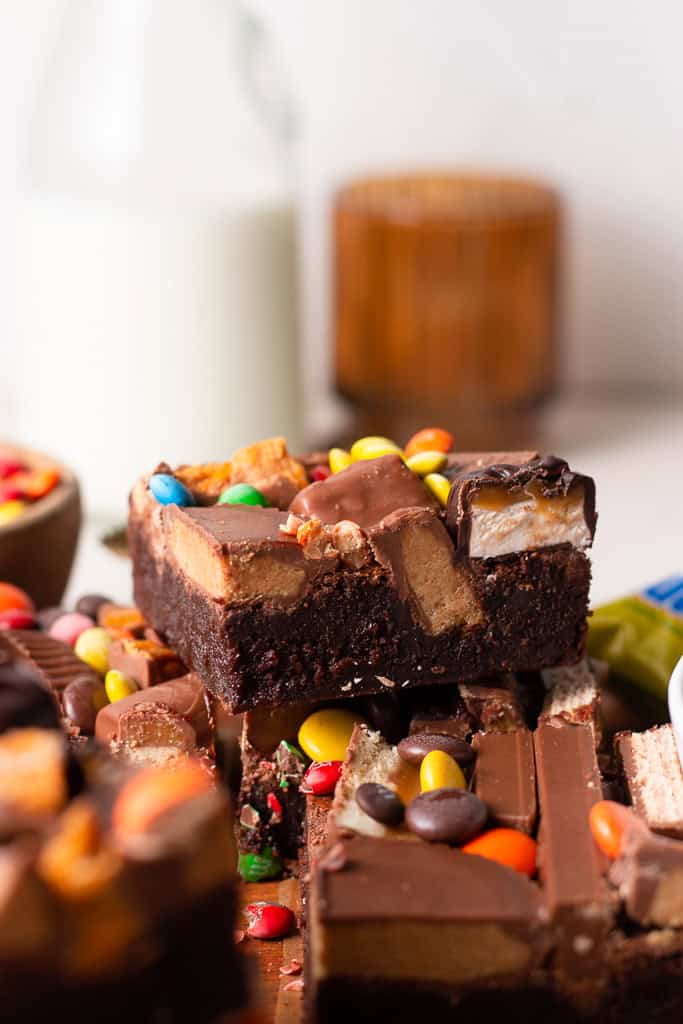
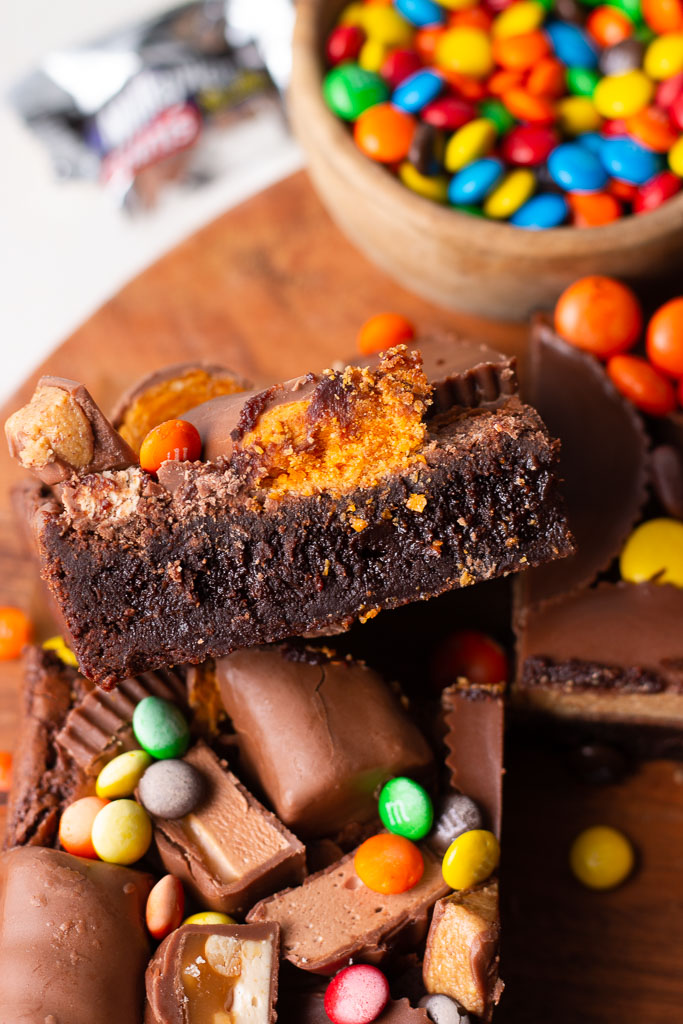
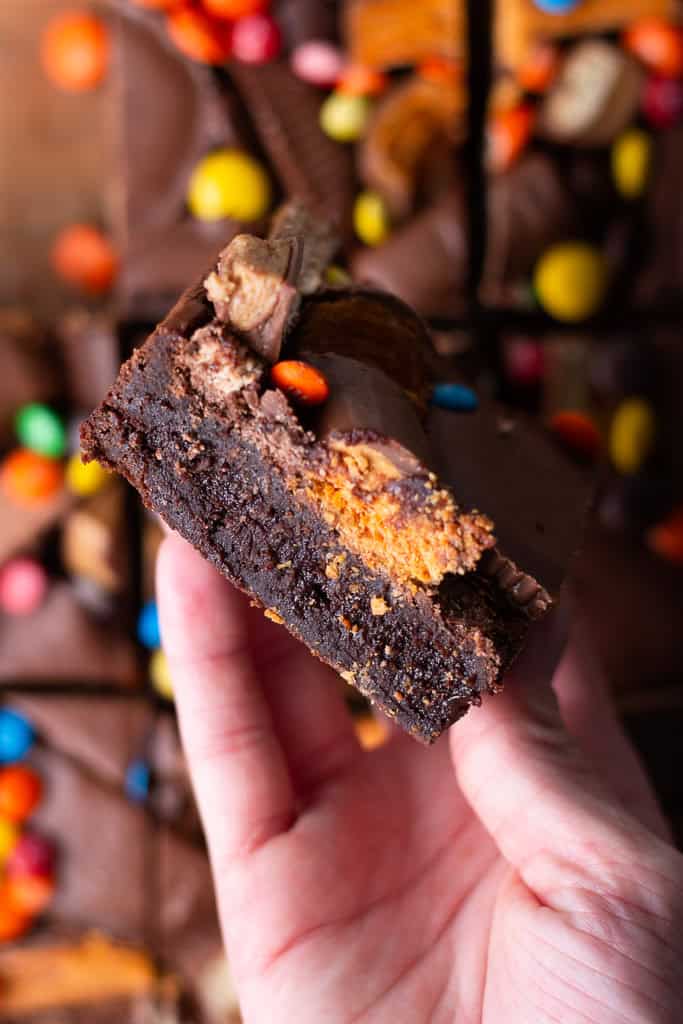
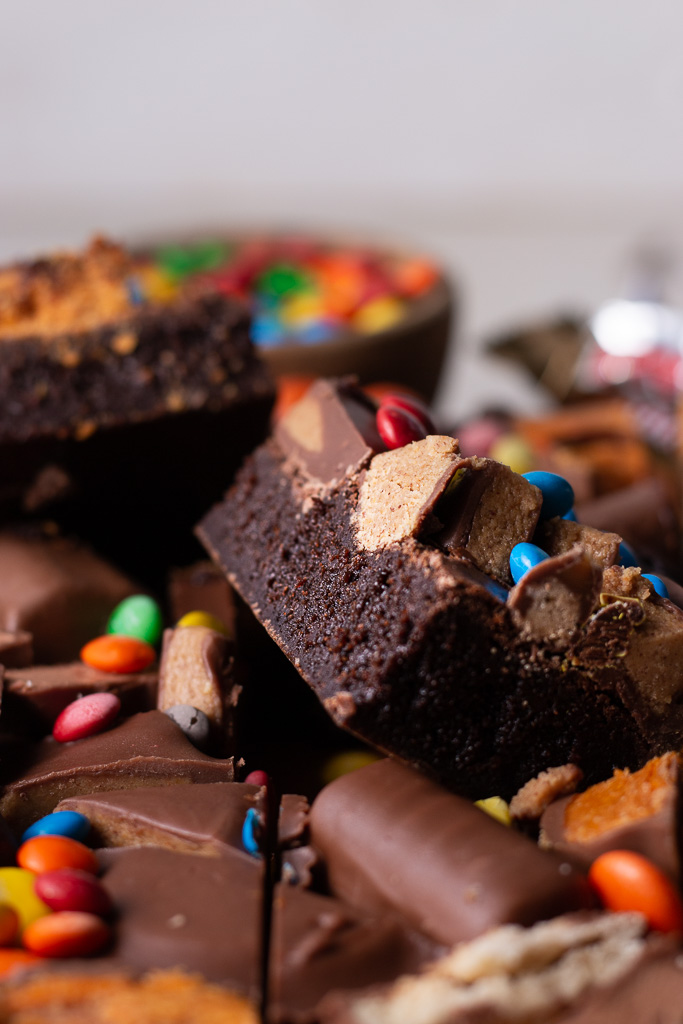
Can’t figure out what to do with leftover halloween candy? Let me introduce you to these leftover halloween candy brownies. Chewy, fudgy chocolate brownies topped with all your favorite candy.
What to do with leftover halloween candy
If you’ve gone overboard with the halloween candy – yet again – this year, baking with it, storing it, or donating it are a few great options. We all know what it’s like to take a trip to Costco in early October, load up on an excessive amount of all of your favorite candies (justifying it by saying it’s all for the trick or treaters), and then having TONS leftover when November rolls around. Or is that just me?
Whatever the case may be, even if it’s not leftover halloween candy and you’re just looking for a fun new recipe to try, these brownies are the perfect recipe for you.
If brownies aren’t your jam I’d also suggest adding the chopped up candies to your favorite cookie recipe, or maybe even baking them into a giant skillet cookie and topping it with ice cream. I can get behind that.
Why this recipe works
We’re using my cosmic brownies here as a jumping off point. I also brought in some techniques from my classic chocolate fudge brownie recipe to make these the fudgiest, most decadent brownies ever (not to mention we’re adding tons of candy on top).
Brownies are one of my favorite things to bake because they take very little effort. Typically they can be made in one bowl and I can almost guarantee you have most of the ingredients in your pantry ready to go already. I’m all about simple recipes, and this one takes the cake. What could go wrong when you pile chocolate brownies high with leftover halloween candy?!
Some equipment you may need…
- Stand mixer: if you’re new to baking, this is something I’d recommend saving up for. You can do so much with this one piece of equipment – I really couldn’t recommend it enough. This one from KitchenAid is the one I have in my kitchen and I don’t know that I’ll ever get a new one!
- 8-inch square pan: I love these square pans because they’re light in color and have sharp sides – which makes anything you’re baking look much more sophisticated, and especially these leftover halloween candy brownies!
- Mixing bowls: I love these glass mixing bowls from Amazon. They’re especially perfect for food photography.
- Wooden spoon: I only use wooden spoons and rubber spatulas when I’m baking, and I love these!
- Measuring cups/spoons: I’ve been linking these in all of my posts because I love them SO much! They are beautiful and look just like some other expensive ones on the market (but wayyy cheaper).
Ingredients for Leftover Halloween Candy Brownies
Before you get to baking these brownies, be sure you have all of these on hand!
- Bittersweet chocolate bars – these are the only things you may not have in your pantry already, unless you’re like me who keeps a stockpile in my baking drawer. I typically use ghiradelli’s bittersweet chocolate, but really most brands will do here. Just make sure you’re grabbing bittersweet and not milk chocolate. We’re adding a lot of milk chocolate via the halloween candy so we don’t want a sweetness overload!
- Unsalted butter – the best part is that we’re melting it down in a saucepan with the chocolate, so no need for it to be at room temperature (that’s a plus for all of us who don’t plan ahead!).
- Large eggs – these will help to hold our brownies together and add a little bit of chewiness at the same time from the egg yolk.
- Light brown sugar – these brownies are heavy on the brown sugar, which I think yields a more chewy brownie texture.
- Granulated sugar – but we’re also adding in granulated sugar, of course, for texture and browning.
- Kosher salt – Diamond crystal kosher salt is the brand I always use in my recipes because I think it’s good to have some consistency in your bakes.
- Pure vanilla extract – this is a time you’ll want to skip the vanilla “flavoring.” It tastes incredibly artificial and you’ll wish you had used pure vanilla extract. Just look for the word “pure” on the label.
- All-purpose flour – I almost always use King Arthur flours, because I think consistency is important when developing recipes. Protein content can vary between brands, so I’d recommend sticking with King Arthur as well!
- Dutch-process cocoa powder – if you don’t see “dutch-process” on the label, look at the ingredients list for something along the lines of “alkali,” which means the same thing!
The halloween candy…
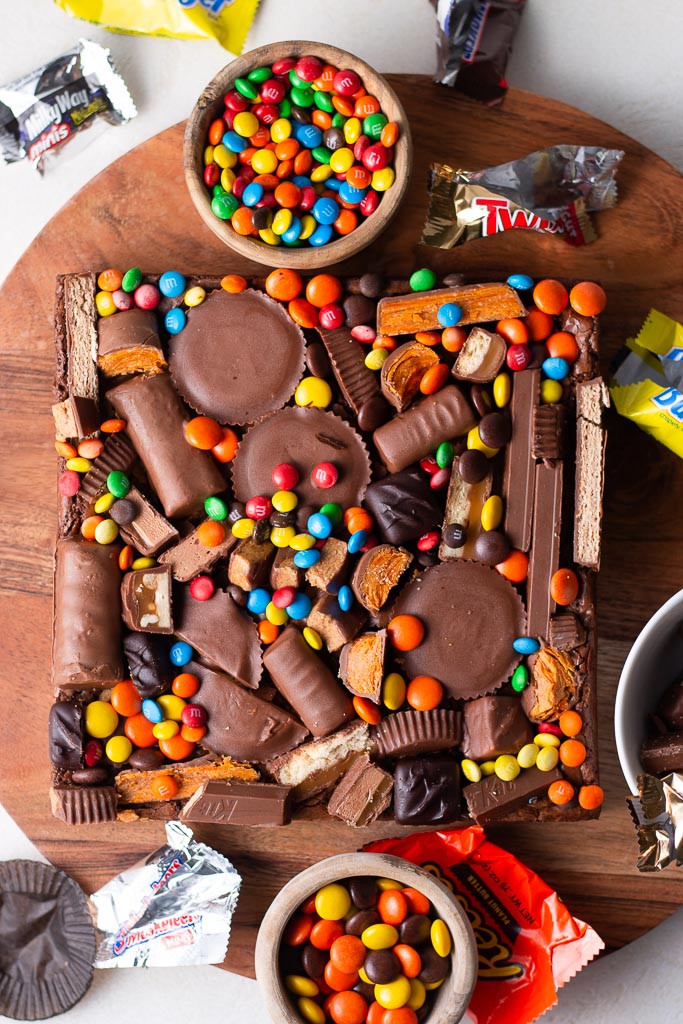
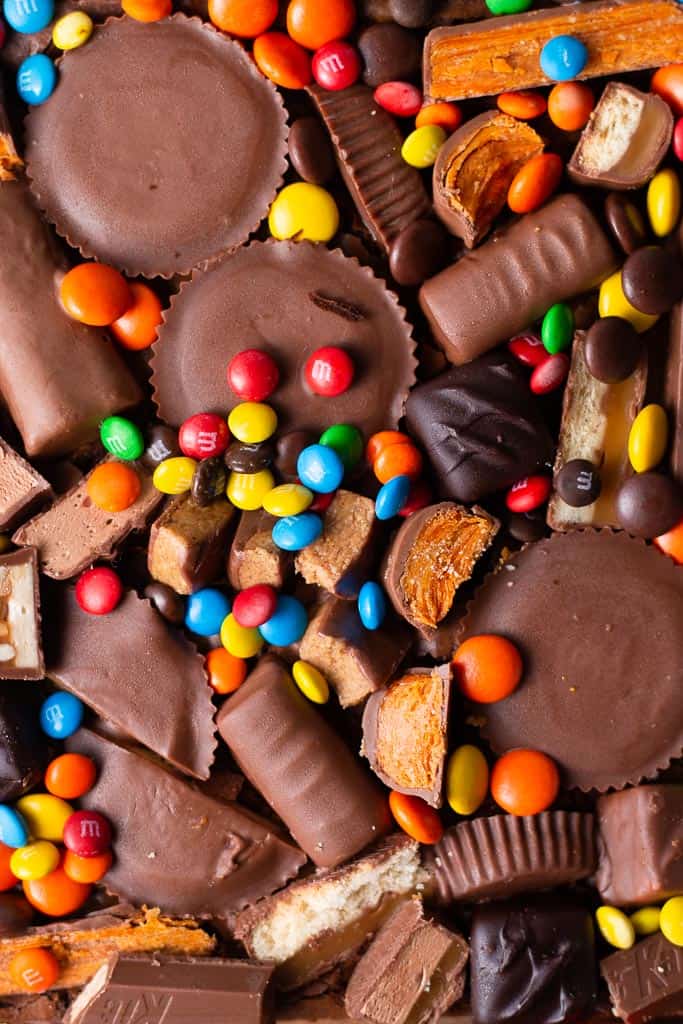
Use the leftover halloween candy you have on hand for this recipe, but if you don’t have any and you still want to bake these, here are the candies I used:
- Reese’s cups
- Kit kats
- Twix bars
- Snickers
- Milky way
- Butterfingers
- Miniature m&ms
- Reese’s pieces
- Three musketeers
Ok, I think that covered it all!
Possible ingredient substitutions
If you’re in a pinch and you don’t have time to go to the grocery store before you begin your leftover halloween candy brownies, maybe you have a few of these instead?
Light brown sugar vs granulated sugar
If you only have granulated sugar on hand, or vice versa, feel free to combine the sugars and use the whole amount of one sugar. Meaning, instead of using 1/2 cup of granulated sugar, just use 1 1/2 cups of light brown sugar (or the other way around).
I called for more brown sugar than granulated in this recipe because I wanted my leftover halloween candy brownies to be more on the chewy side, and I think brown sugar lends to that texture. But if you don’t have it, don’t feel the need to make a trip to the store for it!
Vegetable oil vs butter
If you don’t have any butter but you do have either vegetable oil or canola oil on hand, use that instead of butter. Both are just fats, so you’ll get the same result. I just opted for butter because it provides a lot more flavor.
Salted butter vs unsalted butter
If you only have salted butter on hand, feel free to use that in place of the unsalted butter and reduce the salt to 1/4 tsp.
My Kitchen Tips
Freeze the halloween candy
Because we’re adding the candy to the brownies when they come out of the oven, we don’t want the chocolate to melt away immediately. Freezing the candy in advance will help prevent that.
Don’t forget to tap the brownie batter
I love fudgy brownies, which means we want to knock a lot of air out of the batter before we bake them. A little tapping on the counter will do the trick.
Recipe FAQs
Can I make these brownies in advance
These leftover halloween candy brownies can and should be made in advance. You’ll want to refrigerate them for a few hours before biting into them just to make sure the candy doesn’t melt away.
How do I store leftover halloween candy brownies?
Brownies can be stored in an airtight container at room temperature for about 2 days. I wouldn’t keep them in the refrigerator (unless you like cold brownies), because if you warm them up the candy will begin to melt away.
Recipes for leftover halloween candy
If you still have tons fo leftover halloween candy after baking these brownies, I suggest piling some candies into your favorite cookie recipe. Think of them as monster cookies or kitchen sink cookies! You can add whatever you want to a cookie recipe and it will be dynamite.
Leftover halloween candy would also be so good in this giant skillet cookie, and would be perfect for a crowd – just as an idea 🙂
This was such a fun recipe for me to work on, and I hope I helped you all figure out what to do with leftover halloween candy! I think it will be a staple recipe in our house because leftover halloween candy seems like a new normal for us.
If you have any questions about this recipe or any of the others on my site, feel free to always reach out to me via email (sarah@sarahsdayoff.com), through my Instagram DMs (@sarahsday0ff), or by leaving a comment on a blog post. I’m happy to answer any questions I can!
“If you try and hang on to your life, you will lose it. But if you give up your life for my sake and for the sake of the Good News, you will save it.”

Leftover Halloween Candy Brownies
Ingredients
- Leftover halloween candies (see "ingredients" section for more details) chopped
- 1 1/2 (4-oz) bars bittersweet chocolate, broken into pieces
- 10 Tbsp (140g) unsalted butter
- 3 large eggs at room temperature
- 1 cup (224g) light brown sugar
- 1/2 cup (118g) granulated sugar
- 1/2 tsp kosher salt
- 1/2 tsp pure vanilla extract
- 1/2 cup (100g) all-purpose flour
- 1/4 cup (30g) Dutch-process cocoa powder
Instructions
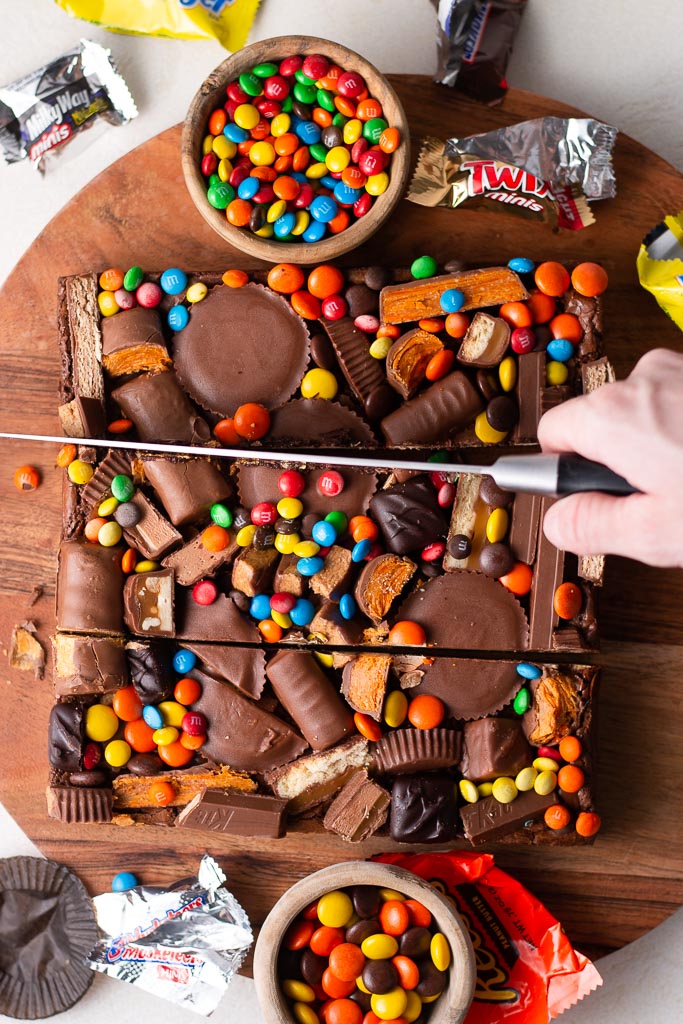
- Before you begin, chop your candies into pieces of your desired size. I left some whole and chopped others. Transfer the candies to a container and place them in the freezer while you make the brownies.
- Preheat the oven to 350°F. Grease an 8-inch square pan* with cooking spray, line with parchment paper, and grease again.
- Add the chocolate pieces and butter to a small saucepan. Melt slowly over low heat, stirring occasionally, until it's completely smooth and you don't see any lumps of chocolate.
- Meanwhile, add the eggs, brown sugar, and granulated sugar to the bowl of a stand mixer fitted with the whisk attachment (you can use a hand mixer for this as well). Beat on medium-high speed for exactly 3 minutes.
- Scrape down the bowl of the stand mixer. Set the speed to low and gently stream in the melted chocolate and butter mixture. Increase the speed to medium and beat until the mixture is completely combined.
- Beat in the salt and vanilla. Remove the bowl from the stand mixer and scrape down the sides and the bottom once more.
- Using a rubber spatula or spoon, gently fold in the flour and cocoa powder until the mixture is smooth.
- Transfer the batter to your prepared pan and spread it into an even layer. Tap the pan against the counter a couple of times. Wait 2 minutes, then tap it against the counter a few more times.
- Bake 40 to 50 minutes or until the center is set and a toothpick inserted into the center of the brownies comes out with only a few moist crumbs.
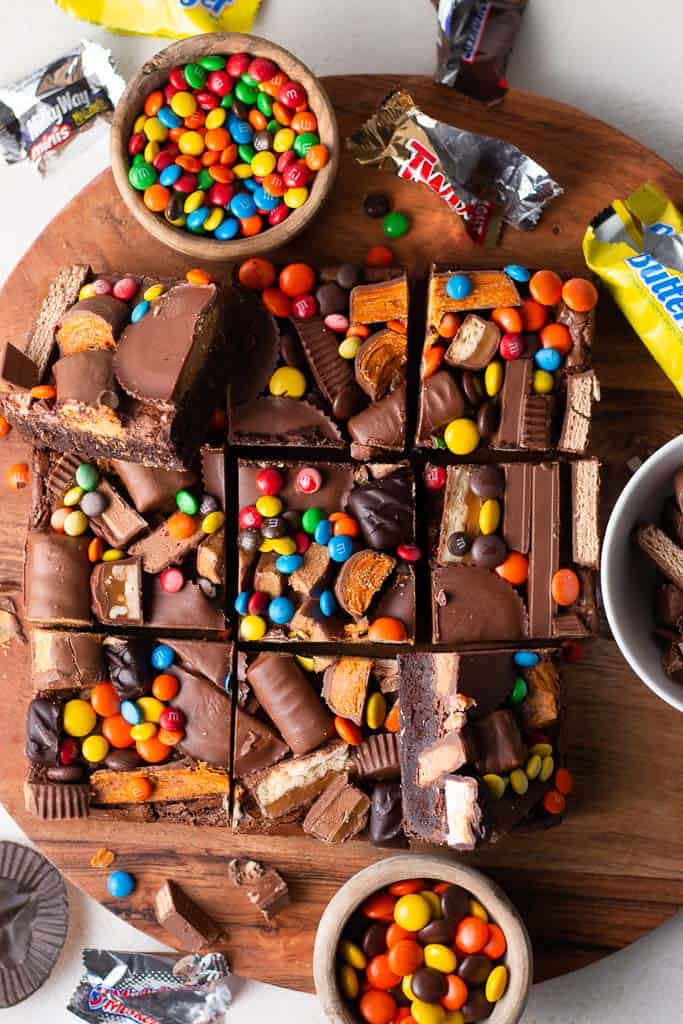
- Immediately lightly press your frozen candies into the top of the brownies. You can take a peek at the images above for inspiration on how to arrange them, or just pile them all on.
- Once the candies are covering the tops of the brownies put the entire pan in the refrigerator to cool completely, at least 2 hours.
Notes
This blog post contains affiliate links which make me a small commission at no cost to you. Thank you for supporting Sarah’s Day Off!


Leave A Comment